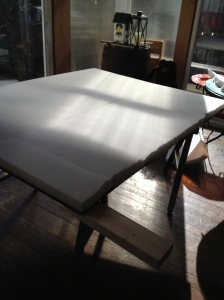
For those of you that have stayed the weekend or night at our house, you know how boring, bland and undecorated our guest rooms are. It’s embarrassing. So a few weekends ago, we decided to tackle the fabric headboard project. It was a quick, cheap and pretty simple way to redo a guest room. Trust me its a lot easier than it looks!
If you have been thinking about making one, check out my simple how to list below!
Materials you’ll need for your queen sized headboard.
- Plywood
- 2 2×4 pieces for legs {we had ours cut at 2ft bc we wanted less legs and a bigger headboard}
- 2 and a half to 3 yards of your favorite fabric {We got 3 and it was plenty!}
- Quilting batting
- 2 to 2 and a half inch thick foam {We had a pretty big peice of plywood so needed two packs}
- Staple guns and staples
- Spray adhesive
1) Purchase and cut your wood for the legs and main peice of your headboard. Lowe’s cut ours for us for free.
2) Drill two peices of 2×4 to plywood to crate headboard legs. Be sure both legs are drilled in at the same part of the plywood so the headboard will sit even.
3) Lay foam on plywood and cut to fit the wood. We used scissors but I saw on different YouTube videos that an electric knife does a perfect job.
5) Lay quilt batting on the floor and flip the headboard face down. Then staple the batting to the back on the plywood.
6) Do the same thing with your fabric that you did with the batting. It’s very important to make sure the fabric is smooth and pulled tight when stapled.
7) Stand it up and you’ve got yourself a new headboard!
It may be helpful to watch a few videos like this one and this one to get a better idea of how to do each step.
Good luck! Send me some pics of your new fabric headboard.


Love it!
-Bean